

Key Takeaways
Why Knife Skills Are a Foundational Kitchen Investment
Most home cooks underestimate how much of cooking is actually cutting. Before anything touches heat, a significant portion of prep time is spent at the cutting board - and how efficiently and safely that time goes depends almost entirely on technique. Poor knife habits don't just slow you down; they introduce real injury risk and result in unevenly cut food that cooks inconsistently.
Strong knife skills compound over time. Once the pinch grip and claw position become automatic, prep becomes noticeably faster, and you'll find yourself less hesitant to take on recipes that involve significant vegetable work. If you're still building confidence in the kitchen more broadly, it helps to read through a recipe carefully before starting - understanding what cuts are called for ahead of time lets you practice them deliberately rather than under pressure.
This article focuses on the core mechanics: grip, stance, board setup, and three essential cut styles. These cover the vast majority of what home cooking actually requires.
Chef's Knife
The primary cutting tool for chopping, slicing, and dicing vegetables, herbs, and proteins.
Cutting Board
Provides a stable, hygienic surface and protects your countertop and knife edge.
Honing Steel
Realigns the knife's edge between uses to maintain cutting performance.
Paring Knife
Handles small, detail-oriented tasks like peeling, trimming, and hulling.
The Core Techniques: Step by Step
Work through the steps below in order. The early steps - workspace setup, honing, and grip - establish the foundation everything else builds on. Skipping them to get to the cutting techniques is a common shortcut that leads to frustration.
What you will need
Set up your workspace safely
Place a damp kitchen towel flat under your cutting board to prevent it from shifting while you work. A moving board is one of the most common causes of kitchen accidents. Clear enough counter space so you can move the knife freely without bumping nearby objects.
Hone your knife before starting
Run the blade along a honing steel at roughly a 15-20 degree angle, alternating sides, for four to six strokes per side. Honing does not remove metal - it realigns the microscopic edge that bends with regular use. A properly honed knife glides through food rather than crushing it.
Master the pinch grip
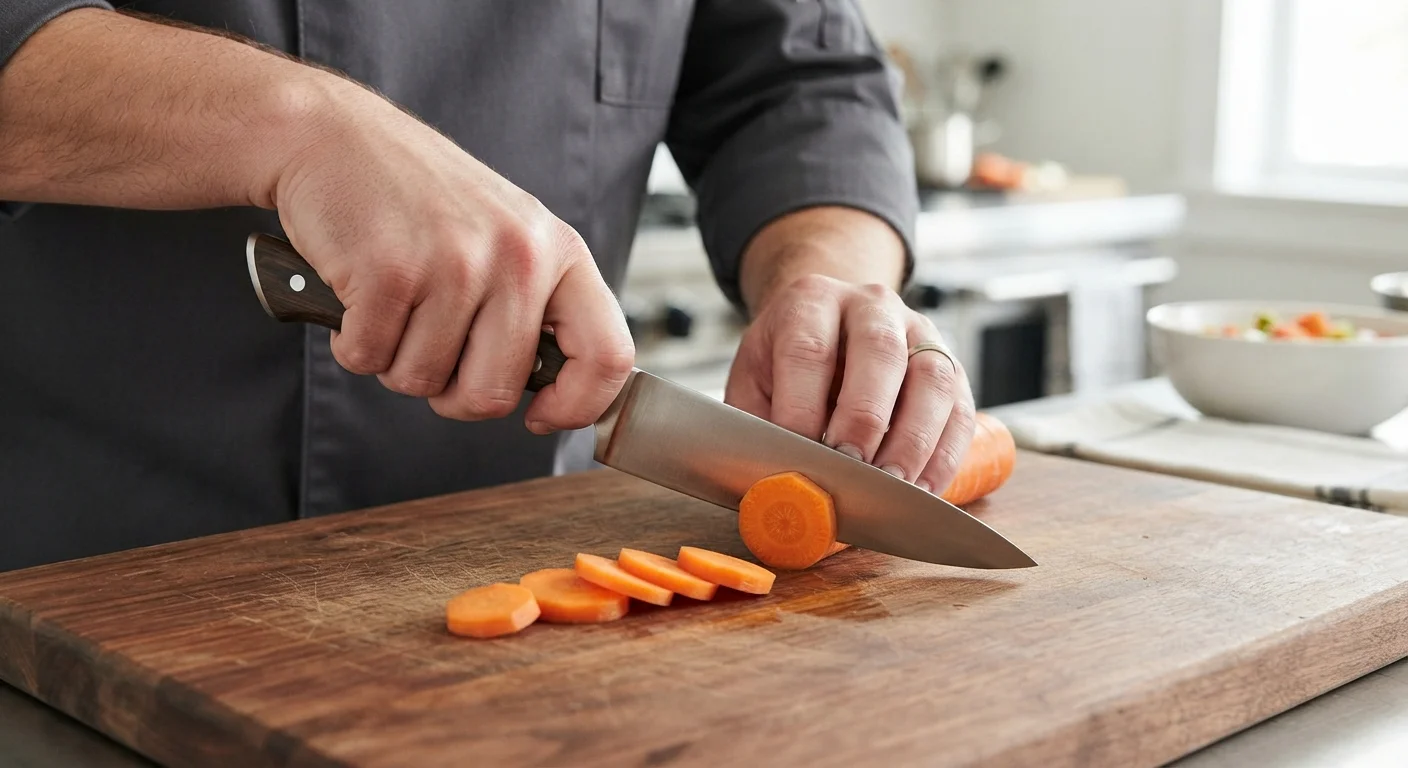
Hold the knife by pinching the blade - not the handle - between your thumb and the side of your bent index finger, just where the blade meets the bolster. Wrap your remaining three fingers around the handle. This grip gives you direct control over the blade and reduces hand fatigue during longer prep sessions.
Use the claw hand position for the guiding hand
Curl the fingertips of your non-knife hand inward so the knuckles face the blade. The flat side of the blade rests against your knuckles as you cut, acting as a guide. This keeps fingertips safely tucked away. Move your claw hand backward incrementally with each slice to control the thickness of each cut.
Practice the basic dice
To dice an onion or similar vegetable: halve it through the root end, lay it flat, and make horizontal cuts parallel to the board (without cutting through the root), then vertical cuts down toward the root, and finally crosscuts to produce even cubes. The root holds the onion together throughout, making this process both safe and efficient. Consistent dice means food cooks at the same rate.
Learn the julienne and chiffonade cuts
Julienne: Square off the sides of a vegetable to create a flat surface, then slice into thin planks, stack the planks, and cut lengthwise into thin matchsticks. Aim for about 1/8-inch thickness for most applications.
Chiffonade: Stack herb or leafy green leaves, roll them tightly into a cylinder, and slice crosswise into thin ribbons. This technique works well for basil, mint, and kale, and preserves the leaves' appearance better than rough chopping.
Sharp Knives Are Safer Knives
A dull knife requires more force to cut, which increases the chance of slipping and losing control. Keep your knife sharp with regular honing and periodic sharpening - most knives benefit from professional sharpening once or twice a year depending on frequency of use. A blade that moves through food predictably is one you can control.
Never Cut Toward Your Body or Hand
Always direct the blade away from yourself and keep fingers clear of the cutting path. This applies equally when peeling with a paring knife. If a piece of food is unstable, create a flat surface by taking a thin slice off one side before making further cuts - do not attempt to hold it steady with brute force.
Once these techniques feel natural, you'll find them reinforced throughout the recipes you cook. For a broader overview of how knife skills fit into everyday scratch cooking, the guide to cooking from scratch connects these fundamentals to flavor-building and pantry knowledge.
Putting It Together: Consistent Practice Matters
Knife skills are genuinely motor skills - they improve with repetition, not just with reading about them. Commit to using proper grip and claw position even when you're in a hurry. The first few weeks will feel deliberate and slow; that's expected and normal.
A few practical ways to build the habit: prep vegetables for the week in one session, which forces repetition across multiple cuts. Take on a recipe that calls for a large amount of one vegetable - minestrone, stir-fry, or a roasted sheet-pan dish - so you get volume practice in a single cook. Running a kitchen readiness check before you start also helps you approach prep with focus rather than scrambling mid-recipe.
Cross-Contamination Starts at the Cutting Board
Raw proteins and ready-to-eat vegetables should never share a cutting surface without thorough washing between uses. Use separate boards - or wash and sanitize the same board completely - before switching between raw meat and produce. For more on this, see our guidance on food safety habits for home kitchens.
Over time, confident knife work removes one of the biggest invisible barriers that leads home cooks to overcomplicate dishes that should be simple. When prep feels manageable, the cooking itself stays in perspective.