

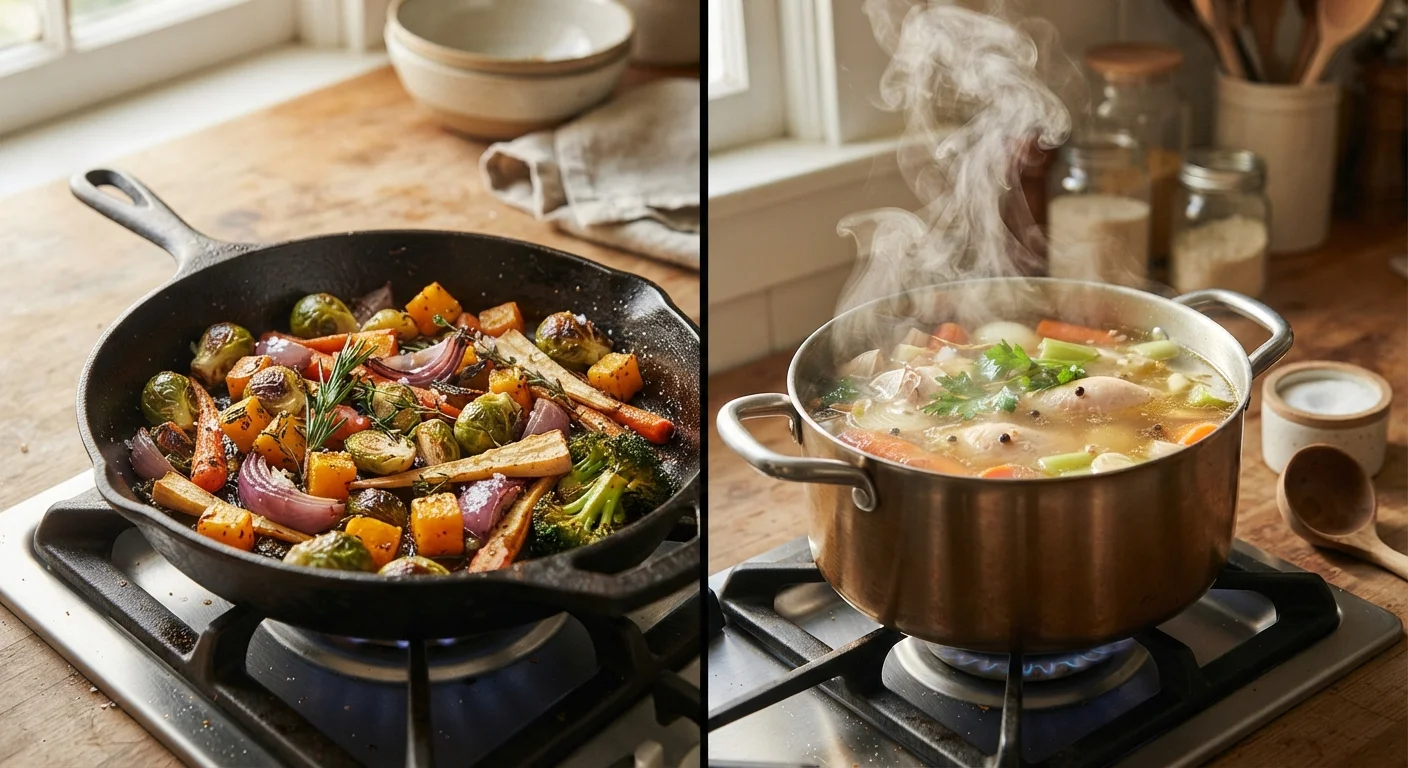
Key Takeaways
Option A
Dry Heat Cooking
The browning, crisping, and flavor-concentrating family.
Best for: Best for tender cuts, vegetables, and foods where a browned crust or caramelized surface is the goal.
Option B
Moist Heat Cooking
The tenderizing, infusing, and gentle-cooking family.
Best for: Best for tough cuts, legumes, grains, and delicate ingredients that benefit from gradual, steam- or liquid-based cooking.
If you want a crispy crust or caramelized exterior
Dry Heat Cooking
Only dry heat reaches the temperatures needed to trigger the Maillard reaction and caramelization, which create brown, complex-flavored surfaces.
If you're working with a tough, collagen-heavy cut like brisket or short ribs
Moist Heat Cooking
Prolonged exposure to moist heat breaks down collagen into gelatin, transforming otherwise chewy meat into something fork-tender.
If you want to preserve the delicate texture of fish or vegetables
Moist Heat Cooking
Steaming and poaching cook gently and evenly, reducing the risk of overcooking or toughening delicate proteins and produce.
If you're cooking a quick weeknight meal with lean protein
Dry Heat Cooking
Sautéing, grilling, and roasting work fast, are well-suited to tender cuts, and deliver satisfying flavor without long cook times.
If you want maximum depth of flavor in a single dish
Dry Heat Cooking
Start with a hard sear to build a flavorful fond, then transition to moist heat - this combination extracts the best of both methods.
What Separates the Two Families
Every cooking technique ever devised belongs to one of two broad families: dry heat or moist heat. The distinction comes down to a single question - is water or steam the primary medium carrying heat to the food?
In dry heat cooking, heat travels via hot air, radiant energy, or fat. No water is involved in the heat-transfer process itself. This family includes roasting, baking, broiling, grilling, sautéing, pan-frying, deep-frying, and stir-frying. Temperatures routinely exceed 300°F and can climb much higher.
In moist heat cooking, water or steam is the carrier. Methods include boiling, simmering, poaching, steaming, braising, stewing, and pressure cooking. Because water cannot exceed 212°F at sea level (higher under pressure), these methods operate within a lower and more controlled temperature range than most dry heat techniques.
This single structural difference has cascading consequences for flavor, texture, and which ingredients each method suits best. Understanding it is foundational - and it connects directly to how pan temperature shapes outcomes at the stovetop level.
| Criterion | Dry Heat Cooking | Moist Heat Cooking |
|---|---|---|
| Heat medium | Hot air, fat, or radiant energy | Water, steam, or broth |
| Typical temperature range | 300°F-500°F+ | 140°F-212°F (up to ~250°F in pressure cooker) |
| Browning (Maillard reaction) | Yes - core to the method | No - surface moisture prevents it |
| Collagen breakdown | Limited - best for tender cuts | Excellent - ideal for tough cuts |
| Best texture outcome | Crispy, browned, concentrated | Tender, moist, fall-apart |
| Common methods | Roast, grill, sauté, broil, fry | Simmer, steam, poach, braise, stew |
| Typical cook time | Minutes to ~2 hours | Minutes (steam) to 8+ hours (braise) |
The Science Behind Each Method
The most important chemical reaction in cooking - the Maillard reaction - requires temperatures above roughly 280°F and a dry surface. This reaction is what creates the brown, savory crust on a seared steak or roasted chicken skin. It produces hundreds of flavor compounds that simply cannot form in the presence of surface moisture. Caramelization, the browning of sugars, follows similar rules.
This is why a wet chicken straight from brine will steam in the pan rather than sear: moisture on the surface holds the temperature at 212°F until it fully evaporates. Pat proteins dry before dry heat cooking for exactly this reason.
Moist heat works through a different mechanism. Collagen, the tough connective tissue that makes certain cuts chew like rubber, dissolves into gelatin when held between roughly 160°F and 180°F for an extended period - exactly the range where long braises and stews operate. No dry heat method replicates this transformation as efficiently.
212°F
Maximum temperature of boiling water at sea level
This physical ceiling is why moist heat methods cannot produce the high-temperature browning reactions that define dry heat cooking.
280°F+
Minimum surface temperature for Maillard browning
Food scientists generally place the onset of the Maillard reaction above roughly 280°F, well above what moist heat can achieve without pressurization.
~160-180°F
Temperature range for collagen-to-gelatin conversion
Sustained exposure in this range during braising or stewing dissolves collagen, transforming tough connective tissue into silky gelatin.
Pressure cookers raise water's boiling point to around 250°F by increasing internal pressure, which speeds the collagen-to-gelatin conversion dramatically - turning a three-hour braise into a 45-minute effort. The physics are the same; only the timeline changes.
For a broader look at why specific temperatures matter for different foods, see the logic behind cooking times and temperatures.
Matching the Method to the Ingredient
Choosing between dry and moist heat is largely about matching the method to the ingredient's structure and the texture you want at the end.
Dry Heat Works Best For:
- Tender cuts of meat (chicken breast, pork tenderloin, ribeye) - they have little collagen to break down and benefit from fast, high heat
- Fish fillets and seafood - quick dry heat methods prevent them from becoming rubbery
- Vegetables for caramelization - roasting concentrates sugars and creates depth
- Bread and pastry - dry oven heat sets structure and browns the crust
Moist Heat Works Best For:
- Tough, collagen-rich cuts (chuck roast, short ribs, oxtail) - long, slow moisture dissolves that collagen
- Legumes and grains - they must absorb liquid to cook through
- Delicate proteins like eggs - poaching keeps temperatures gentle and even
- Root vegetables in soups and stews - they absorb surrounding flavors through the liquid
Many professional and home cooks blend the two. A braise starts with a hard sear - dry heat - to build flavor via the Maillard reaction, then transitions to covered, liquid-based cooking. The result gets the crust-developed flavor of dry heat and the tenderness of moist heat. This idea is explored further in the context of culinary terms like fond and deglazing, which are central to that transition.
For hands-on application of these principles, the easy cooking from scratch guide builds on exactly this kind of foundational knowledge.
A Note on Combination Cooking
Some equipment - such as combi ovens used in professional kitchens - deliberately blends dry and moist heat in a single cooking environment. Home cooks approximate this by adding a small pan of water to the oven when roasting, or by covering a skillet partway through cooking. Neither approach is required for everyday cooking, but understanding why the technique exists reinforces the underlying principle: each method has a distinct job, and combining them strategically produces results neither can achieve alone.